Spicy Prickly Pear Glazed Chicken


I found a recipe online that sounded good, but it made 24 chicken thighs and used bourbon, which we don't have and didn't want to figure out what to do with the extras. I wanted to make this in much smaller portions and leave the bourbon out so I used the recipe as my base and then tweaked it. This turned out really really yummy! It was incredibly moist and tender and the sauce was perfect. I sautéed some canned green beans to go with this and tasted excellent with the sauce as well. Here is how I made it:

Spicy Prickly Pear Glazed Chicken:

Ingredients:

  • Olive Oil
  • 1/2 chopped red onion
  • 2 seeded and chopped serrano chile (use more to give this more kick, or less for a more mild kick. 2 chiles gave it just barely a detectable pinch of spice without making this too hot)
  • 2 cloves garlic, minced
  • 1 tsp ground cumin
  • 1/2 tsp ground coriander
  • juice from one lime (not key lime!)
  • zest from one lime
  • 2 TBS Worcestershire sauce
  • 1/4 c. red wine vinegar
  • 3 TBS brown sugar
  • 1 1/2 c. prickly pear juice
  • 1 tsp salt
  • 4 TBS butter
  • 6 Chicken thighs (we used boneless, skinless)
  • Chopped cilantro as garnish

Directions:

  1. In a sauce pot, heat the oil. Saute the onion over medium heat until browned. 
  2. Add the chile and garlic and saute until softened. 
  3. Add the cumin and coriander and cook for 2 minutes. 
  4. Add the lime juice and zest, Worcestershire sauce, red wine vinegar, and brown sugar. Bring to a boil for 5 minutes. 
  5. Transfer the mixture to an electric blender and puree until smooth. Return the mixture to the pot. 
  6. Add the prickly pear juice, salt, and butter. Return to a boil. Cook until the mixture has thickened. You almost want a paste, but not too gummy. 
  7. In a large resealable bag, combine the thighs with 1/3 of the sauce. Toss to cover and refrigerate for at least 2 hours. 
  8. Preheat the oven to 375. 
  9. Lightly oil a baking pan (or I just lined mine with tin foil). Lay the thighs in the pan, and brush 1/2 the remaining sauce over the top.
  10. Bake for 25 minutes. 
  11. Turn the thighs over and brush on the remaining sauce. Bake for 20 minutes. 
  12. Broil the thighs for 3-4 minutes to finish off. 
  13. Top with cilantro

Peanut Butter and Yogurt Fruit Dip

I had this for the first time yesterday at our weekly play group. One of the other moms brought this to share with everyone and it was SO yummy! It's really easy to make and so good!

What you need:
1/2 cup plain yogurt (I used greek yogurt, which has half as many carbs and twice as much protein)
1/4 cup peanut butter
2 TBS honey
1/4 tsp cinnamon

I actually just kinda guessed at the amounts when I made this. The lady who brought this to play group told me the ingredient list but I didn't ask how much of each. You can adjust any and all the these ingredients until it tastes yummy to you. 

What you do:
Warm up the Peanut Butter and the Honey. I used a small pan on my stove top but a microwave would work great too.
Add all the ingredients together and stir until well mixed.
Serve with apples or anything else you might like (we also tried graham crackers and that was yummy too). This makes enough for 1-2 apples, depending on how big the apple and how much you pile on each bite.  :)

Brownie Baked Oatmeal


3 cups oatmeal (quick or rolled oats)
2 teaspoons baking powder
1/4 teaspoon salt
1/4 cup cocoa powder
1/2 teaspoon cinnamon
1/3 cup brown sugar - make it a scant 1/3 cup
2 tablespoons olive oil
1/2 cup applesauce
1 cup milk
2 eggs
2 teaspoons vanilla

Preheat oven to 350 degrees. Whisk together the dry ingredients in a large bowl. In another bowl, whisk together wet ingredients. Mix together. Pour batter into a well greased 9x13-inch baking pan. Bake for about 20 minutes, or until toothpick comes out clean. Serve with milk.

I like to serve it with sliced bananas and soft whipping cream. Garnish with toasted coconut.
Truly, it is yummy!

I first saw this recipe on Pinterest - the link took me to Rachel's recipe at thrivinghomeblog.com and I adjusted it from there. Thanks Rachel! I'm sure you all are going to enjoy it - Kathleen

(many thanks to Marquette for the pretty pics.)


Fun Santa Pancakes


These were so simple to make and cute! Just use regular Bisquick pancakes, spread some raspberry jam across the top part to resemble a Santa hat and squirt the pressurized whipped cream for the fur around the hat and Santa's beard. A maraschino cherry makes the nose. We didn't do eyes, but I imagine a couple of chocolate chips would work. I was happy with the way these turned out and they were tasty besides! An easy Christmas win!

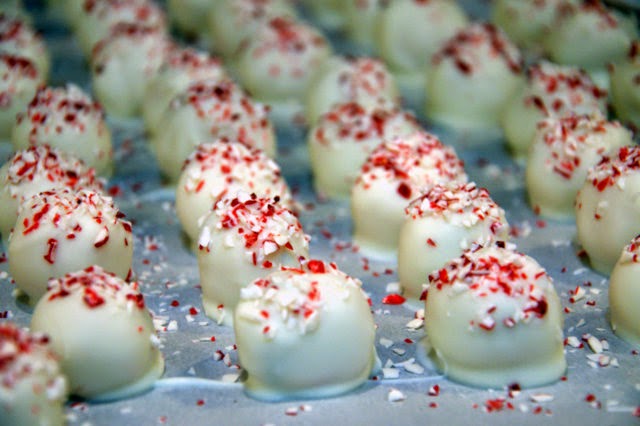
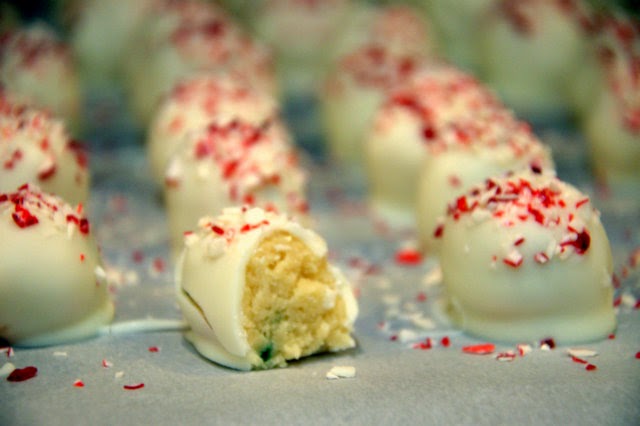
Peppermint Cake Batter Truffles

I took a recipe I found on Pinterest and "Minterized" it to fit the holidays better. I turned confetti cake batter truffles into Peppermint Cake Batter Truffles.


Ingredients:

  • 1/2 c. (1 stick) unsalted butter
  • 1/2 c. white sugar
  • 1 c. white cake mix
  • 1 1/2 c. flour
  • 1/8 tsp salt (omit if using salted butter)
  • 1 tsp peppermint extract
  • 1/2 tsp vanilla (optional)
  • 3-4 TBS milk
  • sprinkles (optional)
  • 1 pkg vanilla/white almond bark or white candy coating
  • crushed mint candies for topping


Directions:

  1. Cream the butter and the sugar until mixed well. 
  2. Add the cake mix, flour, salt, and extracts and mix thoroughly. 
  3. Add in the milk 1 TBS at a time until the mixture reaches a doughy consistency. Add in the sprinkles. It will be slightly sticky, but still be able to be rolled into balls. 
  4. Roll the dough into one inch balls and place in the freezer for about 10 minutes to firm up. 
  5. While dough is chilling, melt coating as per directions on the package. If using a 2lb block of almond bark, I usually use 2/3 of the block. If needed, add 2-4 TBS of shortening to the candy coating to make it more smooth and thin. 
  6. Prepare a pan with waxed paper or parchment paper. 
  7. Dip the truffle balls in the candy coating. I usually drop 2-4 balls in the coating at one time, and then I scoop them out one at a time with a fork to help drain off the excess coating. Place on the papered pan. Immediately sprinkle with crushed peppermint candy (you must do this before the coating sets!). 
  8. Allow a few minutes for the coating to set. 
  9. These are great freshly made, but are especially good after a few hours when the flavors have had a chance to mix and meld.